How to put a wig on for the first time
Allow about twenty minutes for the first attempt. Flatten your hair, set the straps, place the front edge at your natural hairline, then secure the combs. Once those settings are familiar, the same routine should take only a few minutes and does not require adhesive.
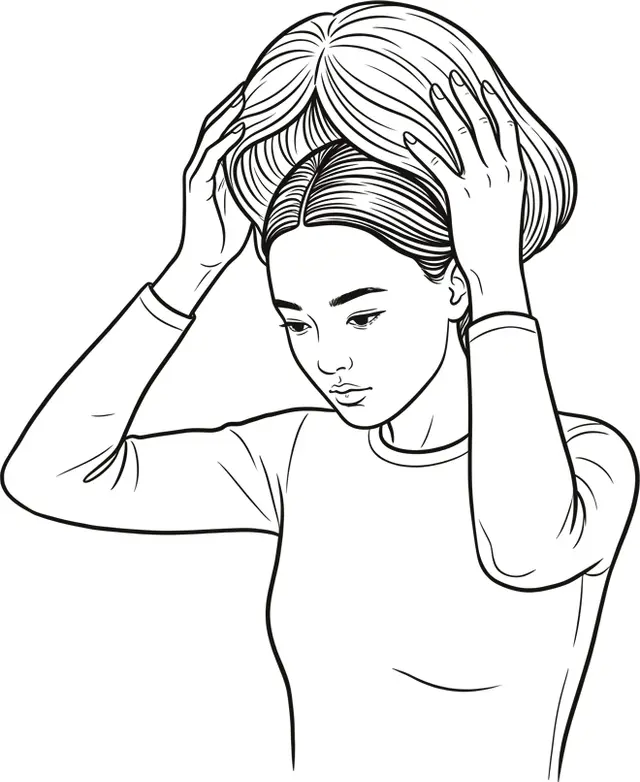
The whole thing, in five moves
- Flatten your own hair so there’s nothing under the cap that changes its shape.
- Set the straps at the back until the cap is snug — once, on day one.
- Position the front edge on your own hairline, working from the front backwards.
- Push the combs in, front last, and check the back is sitting down at the nape.
- Stop. Look at it in a photograph rather than a mirror, and leave it alone for ten minutes.
Everything below is detail on those five. There is nothing else, and no equipment beyond a comb.
What you need, and what you don’t
Needed: a mirror you can see the back in, or a phone camera. That’s it.
Useful: a wide-tooth comb, a wig cap if there’s hair underneath, and a hairband to hold your own hair while you work.
Not needed on the first day: adhesive, tape, scissors, a grip band or hairspray. Each solves a specific problem that may never arise, and several are difficult to reverse. Start with the fitted cap, straps and combs; consider adhesive and its trade-offs only if that setup does not meet your needs.
Your own hair, underneath
This is where most first attempts go wrong, and it’s a five-minute job.
A full head of hair. Part it down the middle and make two flat braids or twists, running from front to back, then pin them flat at the nape. The instinct is a bun — resist it. A bun puts a lump under the crown that no amount of adjusting will hide, and it lifts the whole wig away from your head at the back. A wig cap over the top makes everything smoother and stops the braids shifting.
Thinning or fine hair. Flat pin curls, or simply smoothed back with a little water. The goal is flat rather than secure. A soft cap helps here too, mostly by giving the wig something to grip that isn’t your own hairline.
Very short or no hair. Nothing to do, and you can skip the cap if you find it warm — although a soft cotton one is often more comfortable against the lining than the lining is against skin, especially in the first week.
Setting the straps, once
Inside the back of the cap there are two adjustable tabs. Tighten them until the cap sits snug — you should be able to slide one finger under the edge at the nape, and no more — and then leave them permanently.
Snug is not tight. A cap set to feel immovable at first can become painful after several hours. If it remains loose with the straps fully shortened, revisit the cap size instead of adding more tension. The glueless guide explains how straps and combs share the work.
Placement, which decides everything
Find your own hairline first. Raise your eyebrows and feel where the movement stops — that ridge is where your hair starts, and it’s usually lower than people think.
Hold the wig by the cap at the sides, not by the lace, and bring it on from the front: front edge down onto your hairline first, then roll it back over the crown to the nape. The wig’s hairline should sit on yours, not above it.
Too far forward looks costume-like and gives away that it’s a wig at conversational distance. Too far back is the more common error, and it’s worse — it exposes a strip of your own skin between your hairline and the wig’s, which is the thing everybody in the room notices without knowing what they’re looking at.
Before continuing, check that the ear tabs are level and the back edge sits at the nape. Uneven ear tabs rotate the cap and take the parting off-centre; styling the hair will not correct that alignment.
Combs, and then stopping
Push the side combs into your own hair or into the cap, then the back, then the front one last. If you have very little hair at the front, skip the front comb — it presses on bare skin and it will be the reason you take the wig off at lunchtime.
Then stop. This is a real instruction and it’s the hardest one.
The first ten minutes in a wig feel wrong for a reason that has nothing to do with how it looks: you are looking for it, at six inches from a mirror, in a way that no one else will ever look at your head. Fussing at this stage is how hairlines get shifted out of place and how lace gets torn on day one.
Take front and side photographs with the phone at eye height in ordinary room light. They show the overall placement more clearly than a close mirror and make a tilted cap or misplaced hairline easier to identify.
If there’s lace to trim
Some wigs arrive with lace extending past the hairline and some arrive with it cut. If yours has a strip, leave it alone on the first wear. You’ll want to know where the wig actually sits before you make a permanent cut.
When you do cut it: wig on your head, in position; small nail scissors; snip a little at a time, following the curve of your hairline rather than cutting a straight line across; and leave a hair’s breadth of lace rather than cutting flush. A slightly irregular edge disappears against skin far better than a clean straight one, which reads as a line in photographs.
Cut in daylight and leave a little more lace than your first instinct suggests. The edge cannot be restored once trimmed, and the HD lace guide explains how to protect it afterwards.
How this changes by week two
The first fitting is slow because every step is a decision. Once the straps are set and you know where your own hairline is, none of them are decisions any more — the wig goes on the way a hat does, and the whole business takes as long as brushing your teeth.
If the first fitting still feels daunting, a wig fitter can set the straps and trim the lace in one appointment. After that setup, the routine becomes repeatable. The first-wig guide covers the purchase decisions that need to be settled before technique matters.
What to look for on a listing
- Cap
- Set the adjustable straps once, on the first day, then leave them alone
- Attachment
- Straps and combs are enough for most people; adhesive is a separate decision, not a requirement
Questions people ask
How long does it take to put on a wig?
Fifteen to twenty minutes the first time, most of which is adjusting straps and second-guessing the position. By the end of the first week it's two or three minutes, and it stops being something you think about.
What do I do with my own hair if it's long?
Two flat braids or twists running front to back, pinned flat at the nape, then a wig cap over the top. What you're avoiding is a bun or a ponytail — anything gathered into a lump changes the shape of your head, lifts the wig at the back, and can't be adjusted out afterwards.
Do I need to wear a wig cap underneath?
It's optional and it depends on what's underneath. With a full head of hair a cap keeps everything flat and stops slipping. With very little hair or a tender scalp, a soft cotton or bamboo cap is more comfortable against the lining. With a shaved head you can go without.
Should I cut the lace?
Only if there's lace extending beyond the hairline, and not before you've worn the wig once. Cut it with the wig on, in small snips, following the curve of the hairline rather than a straight line across. It's the one step on this page you can't undo.
Will it move if I turn my head quickly?
A wig with the straps set correctly and the combs in doesn't move for ordinary things — walking, driving, turning to talk to someone. What moves a wig is a cap that's a size too big, which is a fitting problem rather than a technique problem.
From the catalogue
Where most people start
This page doesn't narrow the catalogue, so these are simply well-reviewed lace fronts rather than a match to anything above.

Relaxed Loose Wave Dark Brown Ombre Fade HD Lace Front Human Hair Wig 20"
- Lengths
- 12" · 14" · 16" · 18" · 20" · 22" · 24"
- Lace
- 13x4 Lace · 13x6 Lace
- Cap
- Small · Medium · Large

HD Lace Front Human Hair Wig Deep Espresso Brown Wave Long Pre-Plucked Natural Hairline Brazilian Hair
- Lengths
- 12" · 14" · 16" · 18" · 20" · 22" · 24"
- Lace
- 13x4 Lace · 13x6 Lace
- Cap
- Small · Medium · Large

HD Lace Front Human Hair Wig Peach Rose Wave Highlights Pre-Plucked Natural Hairline Brazilian Hair
- Lengths
- 12" · 14" · 16" · 18" · 20" · 22" · 24"
- Lace
- 13x4 Lace · 13x6 Lace
- Cap
- Small · Medium · Large

HD Lace Front Human Hair Wig Caramel Brown Straight with Bangs Pre-Plucked Natural Hairline Hair
- Lengths
- 12" · 14" · 16" · 18" · 20" · 22" · 24"
- Lace
- 13x4 Lace · 13x6 Lace
- Cap
- Small · Medium · Large